VW Radiator Fan Control
Radiator Fan Control w/ manual override & indicator light:
Over the years, I've been in numerous situations where I would have liked to know if my electric radiator fan was working and/or I wish I could have turned it on. On one unforgettable trip (when my head gasket finally decided to let go) I was experiencing typical signs of overheating. Thinking my radiator fan (actually the thermo-switch) was the problem, I did a quick road fix by splicing two wires to the thermo switch and then simply shorted them together to turn the fan on. Later I added a switch to avoid popping the hood each time to fiddle with the wires. Later, after attending to the blown head gasket, I worked the jury rigged switch into the following:
Notes:
-
This wiring applies to the A1 VW models.
- Other models may have dual-speed fans.
- Also, this circuit was designed for a vehicle w/ A/C, which means that there is a relay to drive the fan. W/o A/C, the thermo switch operates the fan directly, so the manual switch and wiring would also have to operate the fan. It may be a good idea to install a fan relay for this type of setup.
-
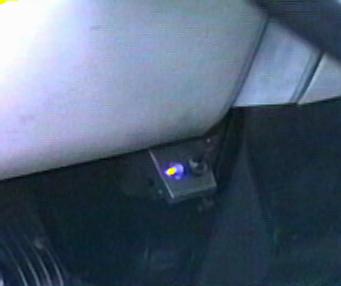
I mount the switch and lamp in a 2-hole switch mount under the dash.
- See the right image, above.
- The green wiring represents the standard factory circuits.
- The magenta wiring represents changes I made.
- The "triangle" symbols indicate conenction to ground.
-
The indicator lamp lights whenever the fan is running.
- I inserted this wire into the fan connector, making contact with the hot wire.
-
The toggle switch allows manual operation of the fan.
- This wire was spliced into the non-ground side of the thermo-switch.
- I have the switch upside down, (i.e. up is OFF) because I found it sometimes was accidentally hit when exiting the vehicle. This way it isn't turned ON by accident.
- Basically the manual switch "fools" the fan relay into thinking the thermo switch in the radiator has closed (which it would do normally when the coolant temperature reached a high enough temperature).
- So, in electrical terms, the manual switch is in parallel with the thermo-switch creating a "logical-OR" circuit, meaning that if either the thermo switch OR the manual switch closes, the fan will come on.
I have found this circuit invaluable for verifying proper fan operation and also in stop&go traffic and when pulling long hills. On long climbs, I found the engine temperature begins to rise sharply until the fan thermostat kicks in at which point the temperature rise slows (and hopefully stops). With the small thermal mass of the system, I worried that it might be possible to overshoot the maximum temperature by using too much throttle. Depending on the ambient temperature and the grade, I find I'm often limited by coolant temperature, rather than engine power. Now, I can turn on the fan before the engine begins to heat and can get a much better feel for how much the temperature rise will be. I have observed no problems with my cooling system since installing this control, but it gives more information and control over it if problems do come up one day.
Parts:
  Multi-conductor cable
  Toggle switch
  12V indicator lamp
  2 position mounting bracket.

Cost:
  SPDT toggle switch   $5
  12V indicator light   2
  Misc wire/connectors  3
  -----------------------
  Total               $10

Rating:
   - some knowledge for electricity required.
Caveats:
- A1 models w/o A/C do not use a relay to control the fan. For these, be sure your switch is rated to handle the inrush current of the fan motor.
- Some later A1 and A2 models have 2 speed fans, so you'll need to figure out how you want the indicator light to run and which speed you want the switch to operate. Take a close look at the wiring diagram to decide how to proceed.
 ===>>
===>> 
Visitor # since 19.SEP.2001
[Last updated: 26.March.2021]