Cheap Suspension Test Ramp
![]()
Contents:
Back to my Cheap Tricks main page.Introduction:
It seems that Ramp Travel Indices (RTI) are all the
rage now, especially with the advent of the Tough Truck Competitions.
No self-respecting 4-wheeler would be caught dead without his vehicle's
RTI number in his .signature
file (present company excluded:-). I've seen plans on the net for
making vehicle ramps, using forklifts to lift tires, driving up loading
docks, wrecked cars, rocks, etc. to attain this magical number.
Maybe I'll test my truck on a real ramp someday (actually did and scored 758 forwards with street pressure and 33x9.50 tires). I realized there are certain benefits to be had from a simpler technique to twist up your truck's suspension. One method is to use a floor jack under a wheel to lift that corner up. Another is to jack up the truck on one corner to accomplish a similar effect. I've tried both of these techniques but the results were unsatisfactory.
I found an approach that is both safer and easier to do than those above. Just use a pair of heavy duty auto ramps and place then in front of two tires on opposite corners then drive up. The ramps I have are about 10" high, giving me a total of 20" of articulation and the capability to go up to an RTI of 570 on my 4Runner. By adding some blocking I can easily go up to around 14" per ramp allowing testing up to around 800 RTI.
Constructing a 20 degree ramp about 10' long and 40" inches high, braced to hold a 4000+ pound vehicle takes a fair amount of steel (and room to store it). Also, once you have a vehicle up the ramp, it is tipped over pretty far and getting in and out, let alone driving up the ramp is not a simple matter. On the other hand, two auto ramps with some blocking can accomplish a similar test, while keeping the vehicle level. In this position, it is also stable enough to allow work under the vehicle while twisted up. You can climb underneath and find out what is holding your suspension up in articulation and see how your brake and differential vent lines handle the twist. You can do this in your driveway and store the ramps in your garage when not in use. One side effect of the diagonal ramping is that it lifts the entire vehicle 1/2 the height of the ramp. In may case, I gain 5" underneath the truck making some maintenance tasks easier.
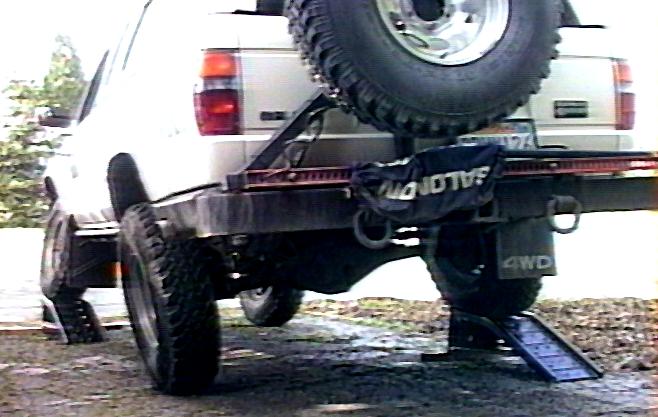
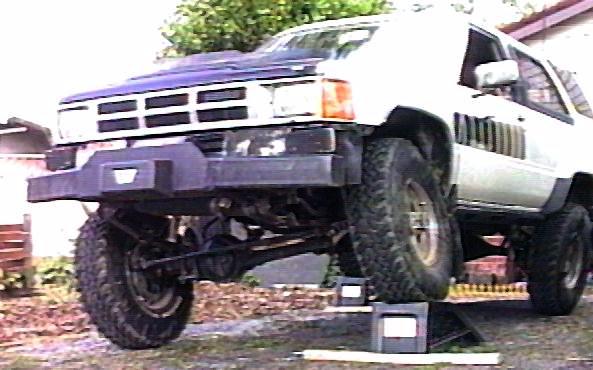
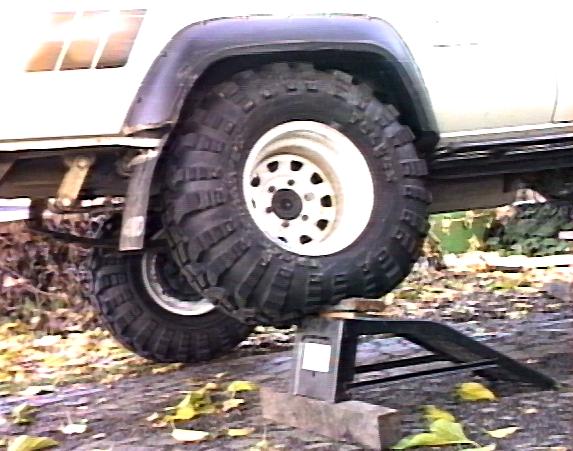
Here's a shot of the ramps in action. You'll notice I slid a 2x4 under the end of the ramp to raise it to about 11.5" offset. You'll notice even with equal offset front and rear, that the rear of the truck is tilted away from the ramp. This indicates the rear springs are stiffer than the front for the given loading. I measure something like 13" front travel and 8" in the rear in this setup. The opposite wheels are still firmly on the ground and I'm running 35 PSI in the tires. My next step will be to build a box to fit over the end of the ramp to gain the 1.5" underneath, and perhaps 2.5" on top for a 14" overall height.
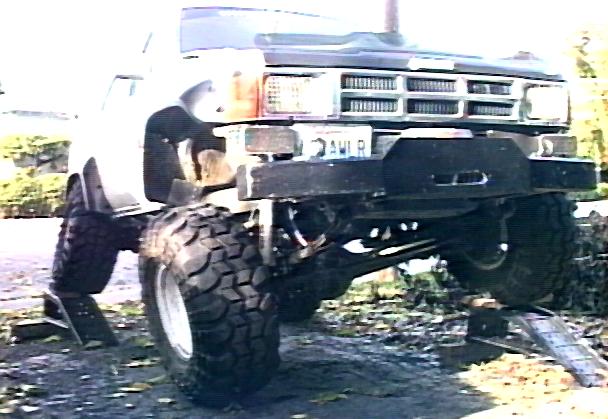
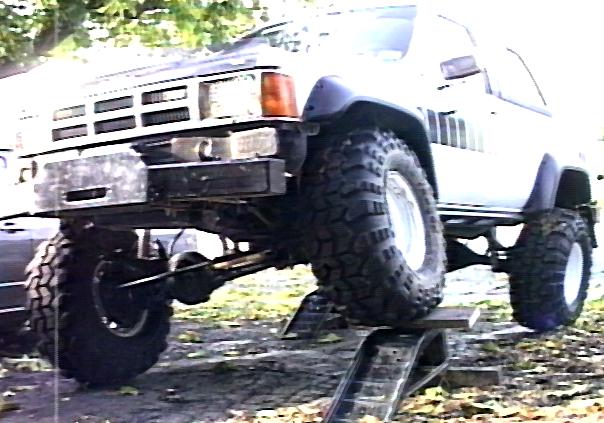
In the lower row of pictures, I'm testing with 33x15.50 Swampers at about 25psi. Here I've cranked the ramps up to a tippy 15" each and all four tires are solidly? on the ground. This shows the effect of wider tires/rims and see how the rear tire is flexing over the ramp. By lowering the air pressure way down, the uphill tire will "squish" and the lower tires will not (less weight on them) so you increase your effective RTI.
[Return to the top]Practical Applications:
I used my ramps to check out how my front springs were performing. Here are my test results:
| State | Passenger | Driver |
| Drooping | 44 3/8" | 44 7/8" |
| Compressed | 46 1/8" | 45 7/8" |
| Difference | 1 3/4" | 1" |
My reason for doing this test was to determine how much longer to make the spring shackles to prevent them from hitting the frame under full compression like they are doing now. The distance from the front hanger to the upper shackle pivot is 43 3/4" and the stock shackles are 3.5" center to center. They hit the frame at about 45 degrees pivot angle and are about vertical at full droop. Unfortunately, at rest, the shackles are nearly touching the frame, closer on the flatter spring on the passenger side. As a result, the passenger side of my truck sits about 1/2" lower than the driver's side. The passenger spring is necessarily flatter because it rides higher on the axle due to the offset front differential. For a given spring stiffness, a flatter spring will flex more than a highly arched one as evidenced by the measurements above.
In addition, the stock shackles were designed to accommodate the range of motion of the flatter stock springs. Changing to a spring with more arch (for increased lift) means the springs have a longer arc length and can therefore elongate more than the stock springs. Therefore, it would seem logical that the shackle length should increase with a longer spring. How much is the question. Using the triangle calculator (below) I played with some number and came up with the following:
To compensate for the 1/2" ride height difference, the passenger shackle needs to be 1" longer than the driver's side (the axle is centered in the spring, so will move 1/2 the amount of the longer shackle). I obtained some unbraced front shackles that are 3" longer than stock, but this is way too much. I don't want any more lift than necessary, so 1" on the driver's side should eliminate the problem of the shackle/spring eye hitting the frame (the compressed shackle angle goes from 36° to 26°). On the passenger side, the shackle will then be 2" over stock to correct the height imbalance and the shackle angle goes from 41° to 22°°at full static compression). So, I'll drill one shackle at 4.5 inch center to center and the other at 5.5".
Here's a really handy web page for calculating triangles side lengths and angles.
I ended up getting some good feedback from my initial ramp testing. After modifying my springs and shocks, I've done several important things to my vehicle:
- Increase rear wheel travel by 1.5" under compression and 1.5" under droop.
- Increased front wheel travel by about 1" in droop.
- All while lowering the ride height by almost 2" to improve off-camber performance.
I'm fairly happy with the overall performance of the vehicle now. I think I'm about at the limit of what I can get out of the current vehicle without going to longer springs, crossover steering, and other major modifications (maybe next year :-).
For a more general shackle length setup strategy, you can use a rule of thumb of setting the shackle angle to be roughly vertical at full droop and kicked back about 45° at full compression. To do this, take the above measurements for the spring (arc length and eye-eye chord length with the spring unloaded) and the spring hanger to shackle hanger distance. Then set up one right triangle (i.e. 90° fame-shackle angle) with the hanger-hanger length on one side and the chord length of the spring on the hypotenuse and find the shackle length for the short side. Then use that length shackle along with the arc length of the spring and shoot for a 135° angle (that is 90° + 45°) on the frame-shackle angle. If the angle is too great, go for a longer shackle angle, or if too small, a shorter shackle. Unlikely you'll be able to hit both angles exactly, but shoot for a good compromise and go from there. And if you can't find an off-the-shelf spring shackle to meet your needs, here is a source for custom length spring shackles for many applications...
[Return to the top]Ramp Travel Index explained:
I believe it was Four Wheeler magazine that came up with the concept of the Ramp Travel Index a few years ago. The standard ramp they chose is sloped at 20°. The Ramp Travel Index is based upon how far you can progress up the ramp with one tire before lifting any other tire off the ground. The index is obtained by dividing that distance up the ramp by the vehicle's wheel base and finally multiply that ratio by 1000. For example, if you can drive up the ramp until the trailing wheel touches the bottom, you score a perfect 1000. Some super-twisty suspensions can go beyond 1000, so you have to have the trailing wheel beside the ramp. In these cases, a steeper ramp (23-30°) is used to increase the slope. The RTI can be measured forwards and backwards, with wider tires, lowered tire pressures, different loads in the vehicle and will probably result in a different number every time.
There's no magic to 20° or the RTI as a number. If you remember
back to your trigonometry classes in school, you simply take the sine
of an angle to get the vertical component of it, e.g. sine(20°)
= 0.342. What this says, is that in order to score a 1000
RTI, you need to be able to obtain sufficient articulation to
accommodate 34.2% of your wheelbase in vertical offset. On my 4Runner,
with a 102" wheelbase, my perfect (RTI=1000) offset would
be 35". I reasoned that instead of doing all 35" on one
wheel, why not split it and do half (17.5") on opposite corners of
the vehicle. It may not be exactly the same, but its a whole lot easier
and just as useful. Actually, since the RTI measurement is taken up the
ramp and not along the horizontal, this is a conservative value. If the
wheelbase is on the 20 degree ramp, the cosine of
20° is 0.939, so the horizontal component is reduced by this
amount (~6%), making a 1000 score = 32.9" in my case.
After all, knowing your exact RTI will not help you off road (at least until they start rating trails by the RTI it takes to run them:-), but improving your suspension's articulation capability will. If all you do is go to a 4WD show and test your truck on their ramp once, that's interesting but not of much practical use. If on the other hand, you have access to your own testing equipment and can test and modify your suspension then compare results of those changes, you should be able to improve your RTI and off road capability.
[Return to the top]References:
Here are some links to various ramps and RTI information I've found on the web:
- ORC has a good RTI article with plans
- Mike RTI page
- John's Ramp Travel Index Page
- Barney's RTI Ramps archive
- Bill Johnston built a nice dual ramp setup
Summary:
Cost:
   1 pr. Heavy Duty Auto Ramps  $25 (I already owned some, so this was no cost)

Rating:

[Return to the top]
Back to my Cheap Tricks main page.
![]()


Visitor # since 28.AUG.2001
[Last updated: 22.March.2021]