4th Generation 4Runner / FJ Cruiser / 2005+ Tacoma / Lexus LX-470
Body Lift Installation Tips
Here are some tips on 4th gen 4Runner, FJ Cruiser, 2005+ Tacoma and Lexus LX-470 body lift installations:
- Good writeup on 4th gen / FJ Cruiser body lift installation
- Steering Shaft Extension
- VSC Adjustments (if needed)
Steering Shaft Extension:
Most, if not all, of these vehicles have the bolted rag joint steering shaft construction. The 2005+ Tacoma and Tundra model pickups use either the bolted or a riveted style rag joint. The rag joint is a round rubber disk that is used to join the upper and lower sections of the steering shaft together along with providing vibration isolation.
Bolted vs. riveted rag joint
The tradional rag joint uses two bolts through a flange on one end of the steering shaft, through the rubber disk of the rag joint. The the other two studs through the rag joint attach it to the flange on the other end of the steering shaft. These two studs have elongated heads that can engage slots in the flange of the mating flange that limit deflection of te rubber rag joint under high steering efforts. The riveted rag joint, as the name implies, uses a pair of over sized rivets to join the rag joint to the upper shaft flange in place of bolts. So be sure to look at the steering shaft rag joint on your vehicle prior to ordering as there are two distint steering shaft extensions to support the two styles of rag joints.
If you order the bolted extension and later find you have the riveted rag joint, you can modify the bolted extension to fit the riveted rag joint. First you'll need to enlarge the center hole to about 13/16" diameter to clear the larger center shaft in the riveted rag joint. Then you'll need to drill out the two smaller holes in the spacer to match the drilled out rivet holes in the rag joint (which you need to drill out in any event). Then you may need to use a larger diameter bolt (3/8" or 10mm) to fit the large holes in place of the 5/16" or 8mm bolts supplied with the bolt-on steering extension. Or of course, you can return the SE1 extension along with the difference in cost of the SE1 and SE2 spacers and return postage and we can send out the pre-modified SE2 spacer.
This is an example of a rivited rag joint. You'll need to drill out the large rivets connecting the bottom of the u-joint to the rag joint.
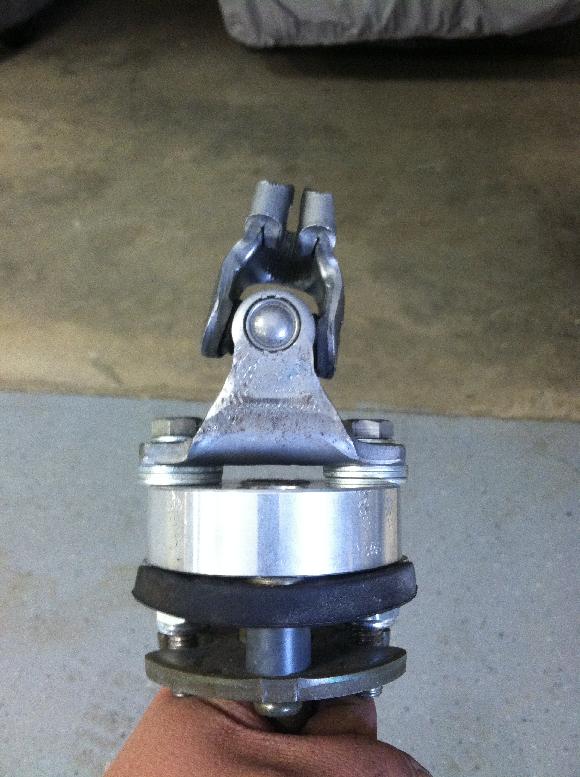
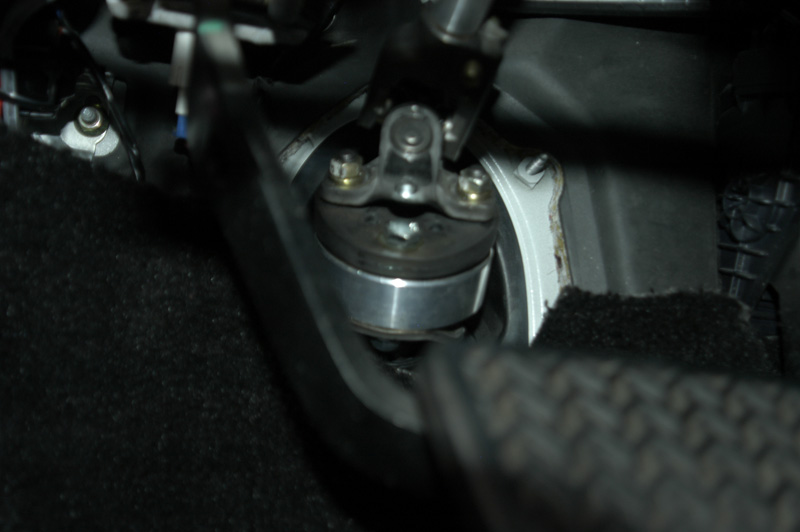
This is an example of the SE2 steering extension installed on the modified rag joint. In this case, a customer modified SE1 extension was used, thus it was a bit short and a few extra washers were required to make up the height difference. The pre-made SE2 extensions are made ~1/2" taller than the corresponding SE1 extension because of the added height needed.
Photo album with additional photos and information on the various steering extension options
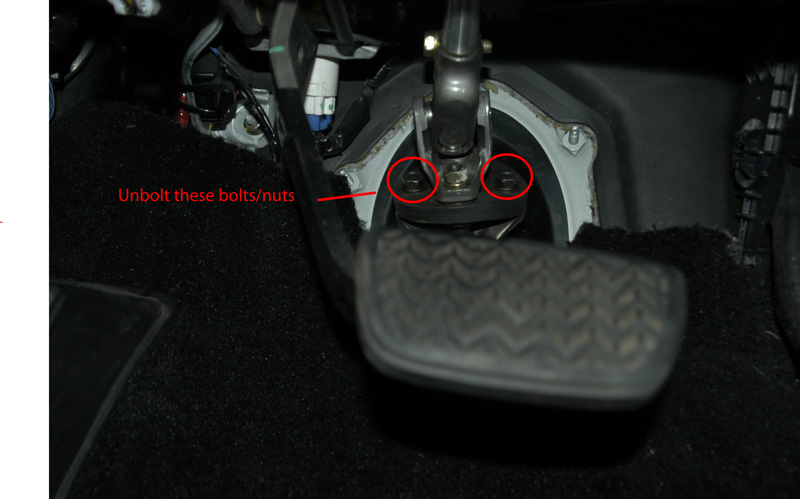
Installation:
Best time to install the steering shaft extension is while you have the body raised off the frame for installing the lift blocks. This will ensure the most working room for installing the extension. Be sure to mark both sides of the steering shaft prior to separating it so that you can align it after the extension is installed. Also, you may want to use something to keep the steering wheel from turning while you have the shaft separated.


If you find there is not enough clearance to fit the spacer in place, try lifting the driver's side of the body up again (like you did when you installed the body lift blocks), or better yet, install the steering spacer before you lower the body down after installing the lift blocks.

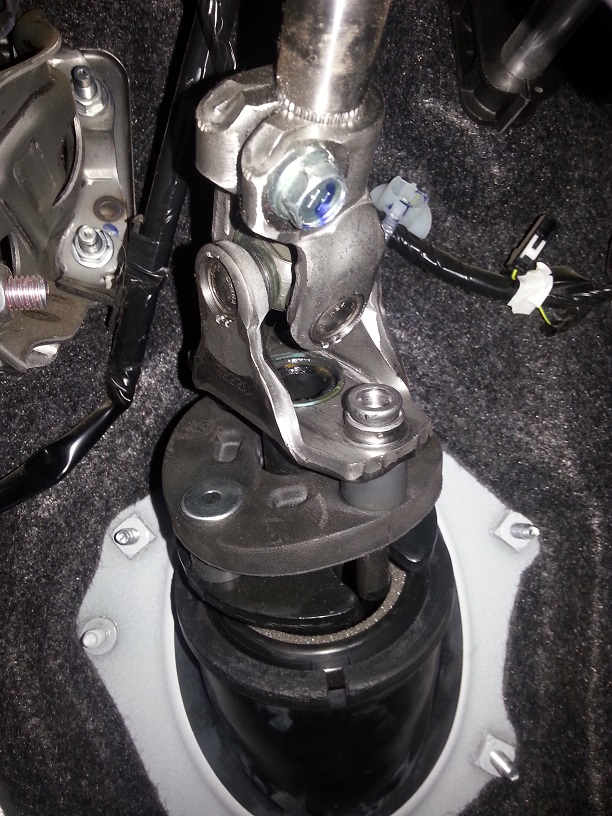
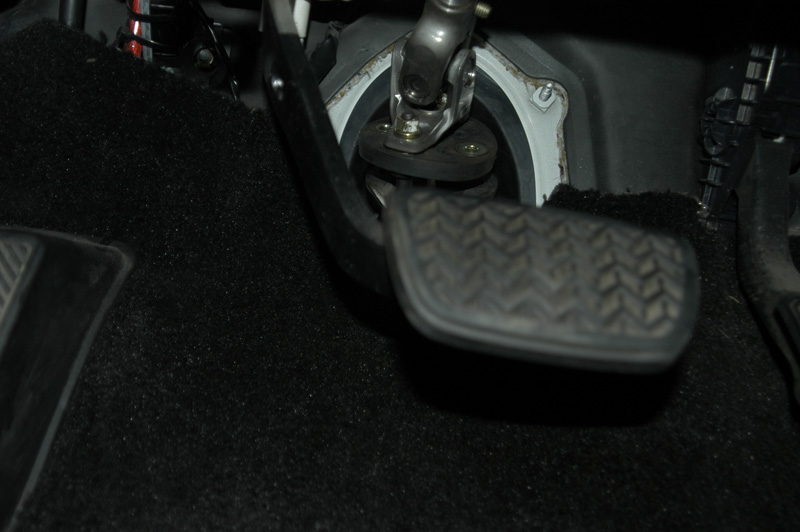
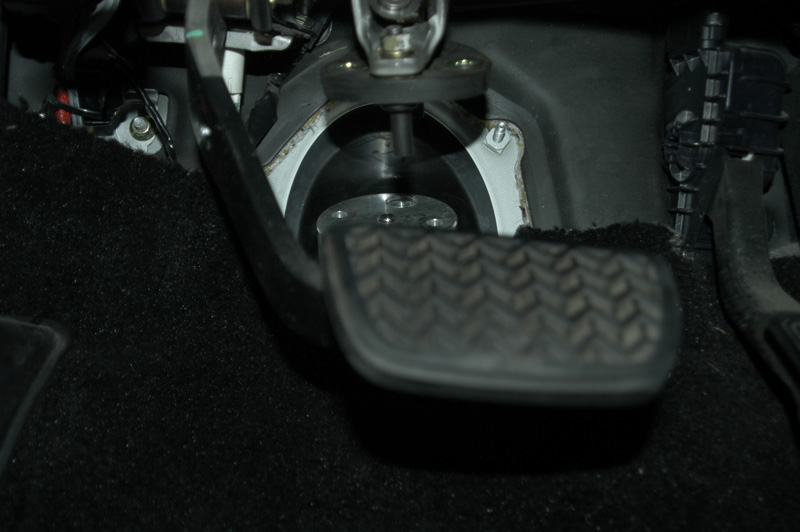
The above images show the bolted style rag joint and steering space installed. For the riveted spacer, it is best to remove the rag joint assembly from the vehicle to allow for drilling out the rivets and fitting the steering shaft extension. Otherwise, installation is essentially the same as for the bolted type rag joint. And if you feel you are unable to accomplish this part of the body lift installation, you might want to consider a lower height lift, such as 1" so that you won't have to perform this modification.
To extend or not to extend, that is the question:
And if you still can't get the extension to fit, you may have a vehicle that does not need an extension. How can this be? Well, some vehicles either have an extra long steering shaft and/or have enough adjustment/play in the steering shaft sections such that the shaft will easily accomodate the mild body lift.
- One way to tell is to bolt the steering rag joint back together and then examine the rubber section of the rag joint. If the rubber piece sits flat all the way around, then all is fine, there is no tension on the steering shaft and everything should work fine w/o an extension.
- However, if you see the rubber section is stretched to the point it resembles a potato chip, then this will tell you that the shaft is under some tension and the extension should really be installed. Make sure all the clamps on the steering shaft are loosened up and free to move and try lifting the driver's side of the body up a little to get enough room to insert the extension.
- It is possible to insert a few washers between the upper part of the shaft and the rag joint to make up a small difference in length. As long as the studs on the rag joint can still engage the slots on the upper part of the shaft, it will function properly.
There seems to be no way to tell ahead of time whether a given vehicle will need an extension or not. The only way you'll know is to raise the body up and try to install the extension and if it fits, you need one, if it won't fit, you probably don't need one. And if you ordered the extension and don't end up using it, you can return it for a refund as noted.
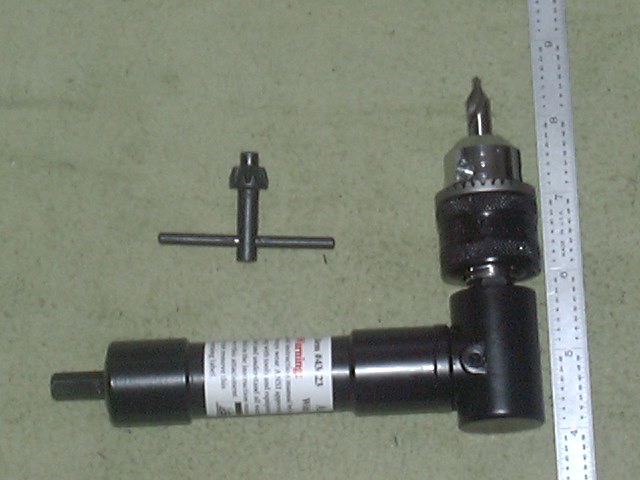
Likewise, some vehicles have a rag joint that is riveted in place instead of bolted. This is common on the 2005+ Tacoma pickups. In this case, installation of the steering extension will require the rivets to be drilled out. While this in in theory easy enough, in practice, due to the limited access to this area, drilling can be tough to accomplish. Fortunately, it seems that the vehicles that use the riveted rag joint also seem to have the extra long steering shafts, so usually do not need the steering extension. So if you examine your vehicle prior to ordering the lift and find you have the riveted style rag joint, might be a good idea to skip ordering the steering extension and see if the lift will work without it. If you find you later do need the extension, you'll need to figure out a way to drill out those rivets. Doing it in place likely requires a small right angle drill and a short bit, such as a #4 drill-point countersink bit (5/16" dia.). Or consult the Factory Service Manual for assembly instructions for removing the steering shaft components and drill the rag joint out on a work bench.
VSC Adjustments:
Here is one thing you might run into after installing the steering shaft extension:
Hey, I just installed this steering extension and have a problem and can't figure out what I did wrong. The VSC is constantly going off, I can't exceed about 10mph before it goes off. It is not drivable at the moment. Any ideas? That is all I have done in the last few days, so I must have done something wrong there.As it turns out, there is a sensor in the steering wheel that is part of the VSC (Vehicle Stability Control) system. It is a pretty easy fix, look up the details in a copy of the Factory Service Manual or on-line:
Sometimes you can get an increase in VSC sensitivity after installing a
lift of any sort on these vehicles. If yours in on the very edge of
calibration, a body lift may push it over the edge. You have to do a
"zero point calibration" on the VSC, it takes a few minutes
and a 4" length of wire. Easy fix, just very annoying to figure
out.
[Last updated: 22.October.2022 ]