Brighter Headlights
Visitor # since 28.AUG.2001
Contents:
- Halogen Headlight Swap
- Upgraded Headlight Wiring Harness Installation
- On-line Ordering
- Want to roll your own?
Halogen Headlight Swap:
The stock 6054 sealed beam headlights in my '82 Caddy were pretty dismal. I remember more than one time getting out to see if they had burned out as I could not see any light on the road in front of me (unfortunately they were not burned out :). So, I decided to swap them out for a halogen lamp. For a while I used a set of Hella Vision Plus, H4 halogen replacement lamps. They worked great, but later I grabbed them and installed them in my 4x4 Toyota (since I tend to drive that in bad weather and very dark backcountry roads).
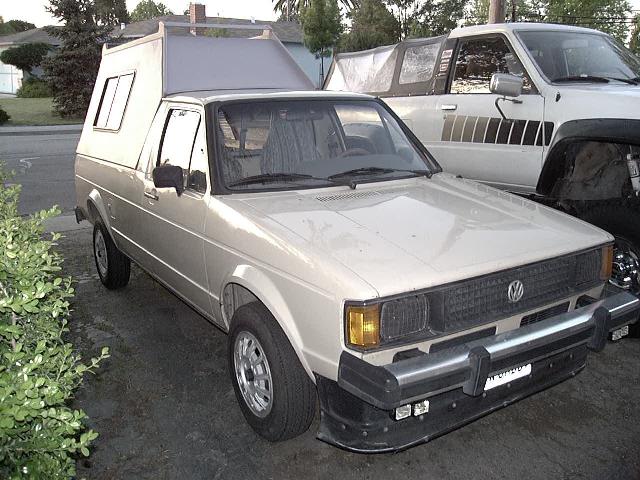
For the Caddy, I decided to get something different. I picked up a set of sealed beam halogen Philips Color Clear lights. I chose them mainly for the black-out color when they are off, they sort of blend into the black grill on my Caddy (see photo below). Also, the black grill inside the housing really cuts down on glare and the lights work just fine for my needs. The only drawback of the internal grill is that it cuts down on the light output a bit, so the extra current I would get with a headlight relay kit is just the ticket. These lights are no longer made, but I have my working pair and a spare lamp, so I'll make do with them for now. With a sealed beam lamp, upgrading the bulb is not an option, so increasing the power to the light bulb is the only way to go.
- NOTE:
- The Philips Color Clear headlights apparently are no longer available and I don't know where to get them.
H4 Conversion:
If you want to convert from sealed beams to the H4 type headlights (w/ separate bulbs), you'll want a 200mm rectangular H4 lamp. With H4 headlights, you have many choices of lamp designs (DOT and E-code light patterns) as well as countless choices of bulb wattages and color temperatures.
[back to the top]Upgraded Headlight Wiring Harness:
After installing a headlight relay kit in my 4Runner, and seeing the skimpy stock wiring and convoluted path that the headlight current takes, I decided it was time to upgrade the system wiring. To re-iterate, this was done on the stock, factory headlight wiring harness, I had made no modifications to it, aside from replacing the old sealed beams with the some Philips Color Clear sealed beam halogen headlights. Besides improving the light output, the relays will take the load of switching the high current of the headlights off the old factory headlight switch. This part is no longer available from VW so if it wears out, the junkyard is the only option to replace it. And if I ever do decide to upgrade to higher output lamps, I'm all set!
- FYI:
- The H4 bulb has 2 filaments, one for low and one for high beam. It has 3 wires arranged in a "U" shape, 2 vertical, one horizontal.
So armed with the knowledge that VW headlights operated on a switched power system (i.e. the common connection of the bulbs is grounded and the power is supplied to one or the other filament to light the bulb), and that I use H4 style headlights in my '82 Caddy, I found a nice looking and well designed wiring harness kit that seemed to fit my needs, it supports 2 - H4 style headlights (one on each side) and works off of the switched power system that VW uses:
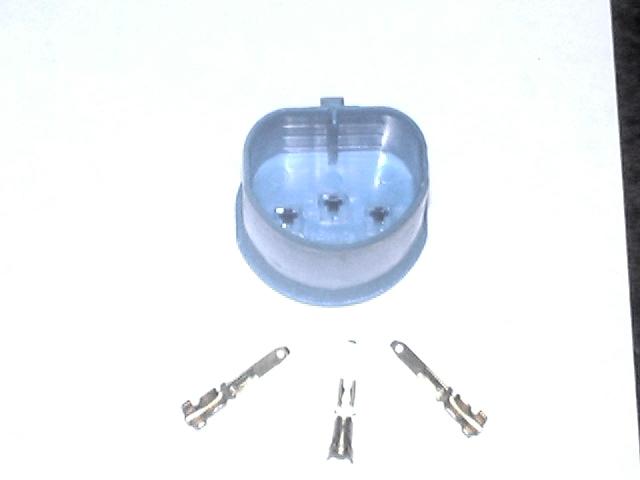
Pictured above is a 9004-style, switched power harness, but its very similar to the H4 harness. The blue connector looks like the back of a headlight bulb and you simply connect one of the existing headlight connectors to it. The harness is designed to accomodate headlight separations of nearly 6 ft. so should fit most common vehicles. Our current relay harness features a total of 4 headlight connectors. There are 2 High/Low beam connectors and 2 additional High beam only connectors. If your vehicle only has 2 headlights, use the connectors with 3 wires connected to them. If your vehicle has 4 (quad) headlights, then use the 3-wire connector on the High/Low beam lamp and the 2-wire connectors on the high beam only lamp.
So on to the installation:
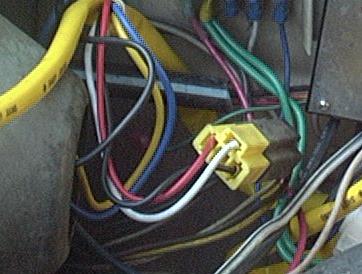 |
| A: Headlight Wiring Harness Connection Note: The H4 style connector (3-wire) |
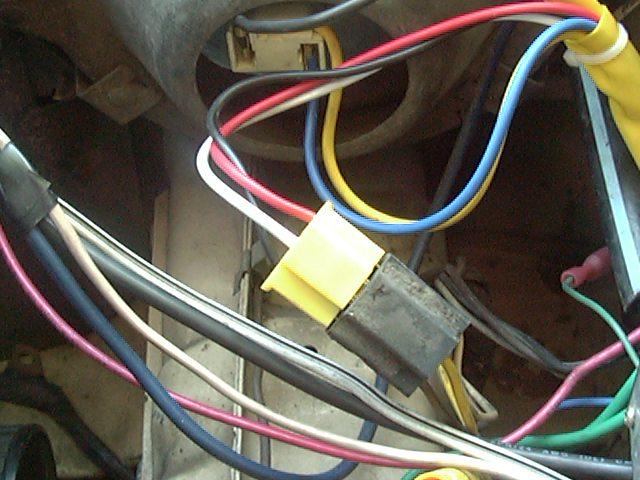
This connection (A) supplies the control power to the two relays in the new harness, you just plug one of the stock (dirty yellow colored) headlight connectors (female H4) into the (bright yellow) mating connector (male H4) on the new harness. It can only go in one way and there is only one male H4 connector, so its hard to get this step wrong! Since this connector is close to the relays, which in turn have to be close to the power source. its best to use the headlight connector nearest where you intend to tap into power. Since I tapped into power at the engine fuse block, I used the passenger side light, your installation may be different. The 9004 harness installing is similar, just match up the male and female 9004 connectors in the same manner as the H4 connectors.
 |
 |
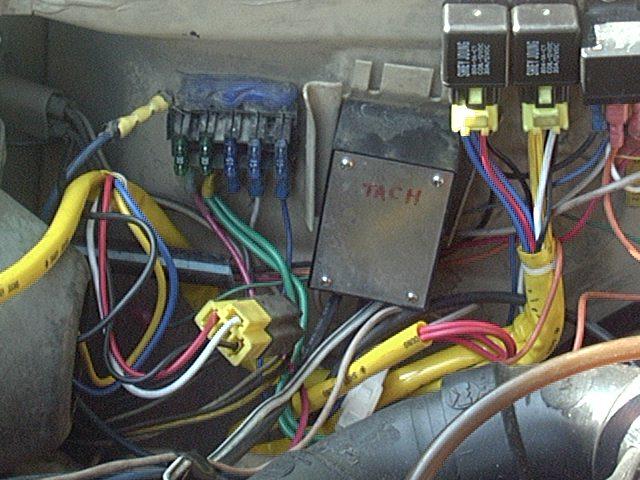
| B: New Relays and Fuse Block Connection |
C: Stock H4 Connector (unused) New H4 Connector Installed |
Then you connect the power leads in one of sevearal ways, depending on your preferences. For a simple installation, you can attach the ring terminal on the red wire directly to the + terminal on the battery. There's a fuse and fuse holder in that wire for electrical protection. Or for a cleaner installation, you could connect the red wire to a fuse block, if you have one.
Then attach the ground wires for each female connector you're planning to use to body sheet metal near by the headlights. I found a couple of body bolts that were a good ground points. You might need to sand off excess paint in order to get a good ground connection. Finally, plug the two new connectors into the headlights (C) and you are done. You can check the quality of the ground connection by measuring the voltage between the headlight connector Common terninal and the battery negative terminal with the headlights on (i.e. you want to test under load). If you see more that a few tenths of a volt difference, check the ground connection and be sure to check on all the used headlight connectors.
For quad headlights, there are a few options for connecting to the high beam only lamps. If those high beam lamps have H4 connectors, just plug in the H4 connector with 2 wires and connect the ground wire from that connector to a good chassis ground point. If the high beam lamps are directly connected to the main high/low beam lamp, you can just leave that connection intact. Alternately, you may be able to connect the high beam wires to the relay harness. One option would be to add an H4 male connector, just like on the high/low beam lamp and then plug the harness connector into that. We have H4 female connectors available or you can find them at an auto parts store or on-line. A second option, would be to pop the terminals out of the 2-wire H4 connector and then crimp on mating spade lug onto the high beam wires and connect that way. There may also be some factory connector on the high beam bulb that can be used. Tape up the connection or add some heat shrink tubing over it.
[back to the top]Try before you buy, or a simple health check for your stock wiring:
 |
| Measuring Headlight Voltage |
Your results may vary so you should really consider testing the voltage, as shown above, on your own headlights. This way you can see ahead of time what sort of "room for improvement" you have. It is important to do this test under load and compare the voltage across the headlight connector vs. the battery voltage. If you are seeing your headlight voltage is within about 0.5 volts of the battery, you are already "doing pretty darn good". Not a lot of room to improve and you are probably getting 95% of the light out of your headlights that is possible and you probably would not even notice a 5% increase if you were even able to get it. So, you would probably be better off not "upgrading" something that is already working optimally (or as they say "if it ain't broke, don't fix it"). Note that human eyes are not terribly sensitive to small increases in light output. For example, it is probably hard to detect a 20% light increase. Also, the increased light output you will see is often in the form of a more uniform light pattern (that is the dimmer areas are now closer in brightness to the brighter spots) rather than the bright areas being brighter. This results in a more useable light pattern (i.e. more light on the road) for driving, which after all is the whole point of the headlights. Also, if you decide you want to upgrade the headlight wiring, you will also know if you have a switched ground or switched power setup.
As it turns out, light output is approximately proprotional to the 4th power of the voltage across the filaments in the bulb. If the higher math is not your thing, have a look at the graph below. It shows light output for a typical halogen lamp on the vertical scale vs. lamp voltage across the horizontal scale. Compare the light output at your measured voltage to that you would see at your battery voltage. To do that, draw a line up at your measure voltage to where it intersects the red line on the graph. Then from that point, draw a horizontal line across to the light output (Lumens) scale and estimate the value. Repeat for the battery voltage and compare the two light outputs.
 |
| Plot of Light Output vs. Lamp Voltage for a typical halogen headlight lamp |
Notes:
- The above voltages were re-measured with a fully charged battery and engine running and the system voltage to be 13.6v. and the lamp voltage to be around 13.2v with a pair of 100W high beams on.
- The light increase, due only to the improved voltage at the headlight bulb, was also measured in another installation to have increased by approx. 80% with a light meter.
- Checking the voltage at the bulb connections is a good way to diagnose problems as well. Just pull the H4 connector part way off the bulb so that you can get a volt meter probe onto the contacts. The center contact is common to both filaments, the other two are high and low beam. Measure several voltages, one is across the filament that is on (that's what I measured above). Then if that voltage is significantly lower than the voltage across the battery, measure from common to the battery positive terminal and from the lit filament connector to a good ground point. If you are getting more than a few 10ths of a volt drop between power and the light or between the light and ground, look into the wiring and connections in those areas.
- The H4 harness will also work just fine with sealed beam headlights, either halogen or conventional style.
One thing to consider with halogen bulbs is that they last longer when run as hot as possible. The halogen gas inside the lamp combines with the (tungsten) metal ions that "boil" off the filament during operation and forms a tungsten-halide compound. This tungsten-halide circulates inside the bulb and when it hits the hot filament, it decomposes and redeposits the tungsten on the filament and releases the halogen back in gaseous form. This helps to keep the the light output more constant over time (since the tungsten does not deposit on the inside of the glass envelope) and by replenishing the tungsten on the filament, it does not burn out as fast. This chemical reaction takes place at temperatures in the 500°F-750°F range and when the bulb operates at the proper temperature, it can last many times longer than a normal incandescent bulb. However, when a halogen bulb runs too cool, this mechanism doesn't work as well so the bulb burns out faster and give less light. In fact, since halogen lamps and filaments tend to be smaller than normal incandescent bulbs, they can burn out much faster. This is sort of the opposite for normal incandescent light bulbs, they generally last longer at lower voltages. So, for maximum lifetime out of your fancy halogen headlight bulbs, you want to run the lamps as close to their full rated voltage as possible.
On the other hand, all the wiring harness is doing is supplying more of the system voltage that the bulb was designed for to the bulb. You will not get any more voltage than the vehicle's charging system is capable of delivering even if you used huge cables or even super conducting wires. So in no way will the harness lead to a light burning out from too much voltage. That is if your charging system puts out say 13.8 volts DC at the alternator, there is no way to get more than that 13.8 volts to the light bulb with any combination of (passive) wires and relays, all you can hope to do is to lose as little as possible of that 13.8 volts between the source (the alternator) and the load (the light bulb).
For LED headlights, voltage drop isn't as much of an issue, to a point. LED headlights usually operate at higher (than battery) voltages and use a constant current driver to boost the voltage up to drive the LED emitters. As such, that driver will only pull as much power as it needs from the headlight wiring. If it needs 3 amps at 12 volts, it might pull 3.6 amps at 10 volts and the LEDs will still see the same 36 watts. However, those LED drivers will have a minimum voltage rating, below which that can't operate. While an incandescent bulb will just get dimmer and dimmer as the voltage drops, the LED will stay the same brightness down to the point that the voltage drops below the minimum, at which point it'll just shut off. Also, LED drivers may be polarity sensitive, so make sure you're getting the right polarity at the headlight connector. Likewise, there's some variability in LED driver pinouts of the headlight connector. Common, Low and High beam pins may be in different locations. It's fairly easy to swap pins in the female H4 connectors, just pop open the back cover and use a small flat bade screwdriver to release the retaining tab on a terminal and pull it out. Then slide it into the new location and it'll click into place when you press it in far enough..
[back to the top]Results:
So how well does the system work? In my opinion, it works great. The relays are socketed for easy replacement if needed, and I like the fact that I can revert to stock just by swapping back to the old headlight connectors, handy if a relay dies on a long road trip, or I want to move the harness to a new vehicle. All the wires are run in protective looms, and everything is straight point-to-point connections, no splices or other mid-wire breaks.
For a quick test of how effective the harness is, I used a volt meter across the headlight bulb to measure the actual voltage drop at the filaments (or as close as I can get to them:). With the stock harness, I measured 10.6v and with the new harness, I got 12.6v. May not seem like a huge difference, but light output is shown on the above graph and is about 80% more light, for the same bulb no less. Pretty good for a $39.00 harness and a few minutes of installation time. In fact, the light output of the sealed beam halogen head lamps I had in there was increased to the point that I decided it was not worth it to change the lamps out, at least until those sealed beams burned out. As they say, "if it ain't broke, don't fix it!"
- Note:
- The above voltage was re-measured with a fully charged battery and engine running and I found the system voltage to be 13.6v. and the lamp voltage to be around 13.2v.
One thing to consider with halogen bulbs is that they last longer when run as hot as possible. The halogen gas inside the lamp forces the metal ions back towards the filament to redeposit them and increase the light output. When run too cool, this mechanism doesn't work as well so the bulbs burn out faster and give less light. This is sort of the opposite for normal light bulbs, they generally last longer at lower voltages. On the other hand, all the wiring harness is doing is supplying more of the system voltage that the bulb was designed for to the bulb. You will not get any more voltage than the vehicle's charging system is capable of delivering even if you used huge cables or even super conducting wires. So in no way will the harness lead to a light burning out from too much voltage.
[back to the top]Which wiring harness do you need?
 |
 |
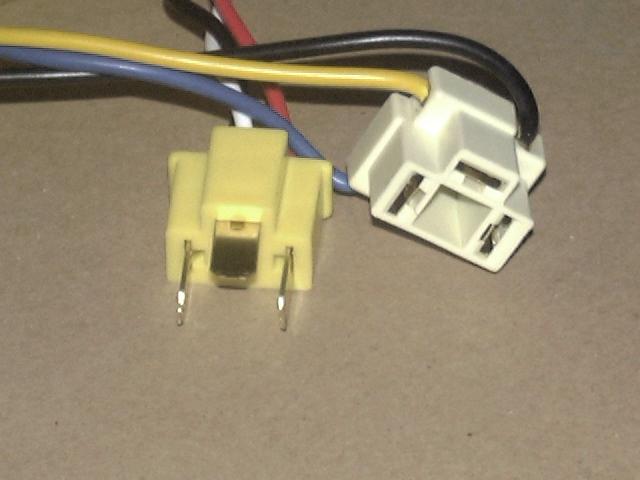
| A: H4-style Connectors | B: 9004-style Connectors |
-
You basically need to pick a harness that has the right number and kind
of headlight connectors that match your vehicle.
- The H4 (photo A above) style harness supplies power to two headlights, either the sealed beam 6054 style or the separate bulb H4 or HB2 or 9003 style.
- Commonly used on Volkswagens.
- The 9004 (photo B above) is used on many newer vehicles including Mercedes.
-
Then you need to determine if you have switched power or ground style
headlights.
- VWs usually use switched power wiring for the headlights.
- If you have a wiring diagram for the vehicle, look for the headlight wiring, if the high and low beams connect to a switch that runs to a 12V power source, then you have switched power setup, otherwise it is likely switched ground.
- Or use a test light or volt meter to determine how the headlight socket is wired.
Bottom line:
-
If in doubt of which type of harness to use, get the switched-ground
version.
- It is easy to convert it to switch power operation if needed.
- Also, the switched-ground harness, if used in a switched power system, will simply not turn the low beams on, while a switched-power harness in a switched ground system may cause excessive currents to flow in the harness.
On-line Ordering:
We have a limited supply of the H4, switched power harness Missing LinkZ e-mail for more info.
-
Cost of the H4 harness is US$39.00/ea.
- Our new design has 2 pair of H4 connectors per side, so if you have a vehicle with quad hedlights, you can operate both from this single harness.
- If you only have two headlights, no problem, just don't connect the extra connector on each side.
- Unfortunately, the 9004 harnesses are currently out of stock.
- Ships in USPS Priority Small Flat Rate box
- Includes relays and mounting hardware.
- You'll need to supply a power connection and fuse(s) to connect the harness to your vehicle:
|
H4 Plug-N-Play harness |
9004 Plug-N-Play harness |
| H4 Harness, US Delivery | 9004 Harness, US Delivery |
| H4 Harness, Canada Delivery |
9004 Harness, Canada Delivery |
| H4 Harness, Int'l Delivery |
9004 Harness, Int'l Delivery |
Notes:
- If ordering a harness for a switched ground Toyota or other Asian-import vehicle, this harness may not work in that application.
- Quad harness can operate 1 or to 2 headlights per side, one is a normal Hi-Lo beam, the other high beam only.
-
So how do they work?
- One word, WOW! The big difference I find from before is the light coverage is more filled in. The brightest areas are about the same, but the surrounding areas or much more illuminated. Before, my high beams lit up down the road well, but left a huge dark void in front of the truck. I used to have to run with the fog lights on on winding roads to get enough light on the sides of the road to see the upcoming turns. Now, the high beams are sufficient.
-
For More Information:
- Daniel Stern Lighting is another good source of automotive lighting information.
Want to roll your own?
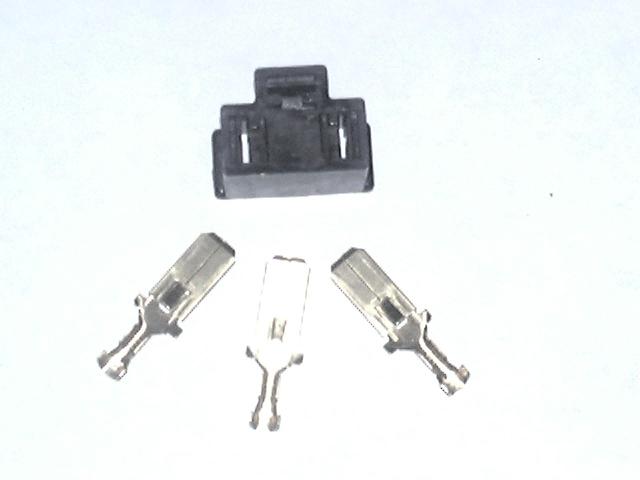
If you want to make your own relay wiring harness or convert from one type of headlights to another? No problem. Usually most of the items needed are available like wire, relays, replacement headlight connectors (female), but if you have trouble locating any of those items, we stock a small supply of Bosch-style headlight relay sockets, 30 and 40 amp headlight relays, and female H4 and 9004/9007 headlight sockets.
The hard to find item is the male connector that mates the relay harness into the existing wiring. Now they are avialble in both an H4-male and 9004/7-male connector shell with pins that you can use to make your own harness or use to convert one type of headlight to another. For example, if you have a 9004/7-equipped vehicle and want to upgrade to H4 headlights, order the H4 harness and the 9004/7-male connector and then swap the H4-male connector on the relay harness for the 9004/7-male connector and you are set and have made no changes to the factory wiring. The relays will be controlled via the 9004/7 factory wiring and will send their output to the new H4 connectors on the harness to the new headlights. The 9004 and 9007 headlights share the same physical connector shell, but the high/low/common pins are swapped, so depending on how you wire up the connector shell will determine if it is a 9004 or 9007 type of connector.
The male connectors cost US$12.00/ea. or 2 for US$20.00 plus shipping.
 |
 |
| H4-male | 9004/7-male |
Also available are female H4 and 9004 connectors as well as relays (30 and 40 amp) and relay sockets.
[back to the top]Need a conversion harness?
In some cases, you may find you need to change the type of headlights in your vehicle. For example, you may have a 9004 headlight currently, but want to upgrade to a more widely available H4 setup. To do so, you need to change out the headlight connectors. Instead of swapping out both headlight connectors, another option is to use a relay wiring harness kit, that is also built to convert the type of connector as well. For example, if the harness were set up with a male 9004 connector to mate with the original 9004 connector in the vehicle, and if it had female H4 connectors for the new headlights, you could install the harness with no changes to the factory wiring, a true plug-n-play installation. If you want an H4 or 9004 harness pre-configured with an opposite (9004 or H4) male connector, that can also be done for a cost of $25.00 on top of the cost of the relay harness and connector(s) (see above). More information available via e-mail.
[back to the top]

[Last updated: 28.September.2025 ]
Visitor # since 28.AUG.2001