
VW Transaxle Drain/Fill Plug Tool
a product of Visual Diagnostics LLCContents:
[Return to the main MissingLinkZ page...]Introduction:
If you have ever changed gear oil in a VW water-cooled transaxle, you have had to deal with that 17mm socketed drain and fill plug. In the past, people have used a 17mm allen key and also old lug bolts welded to a steel bar to fashion a removal tool, but those never worked well. A much better solution was a small adapter that let you use any 17mm socket or wrench that you already have (hint: 17mm is the size of the lug bolts on the wheels). The adapter will also work with an 11/16" socket or wrench and will also work with adjustable wrenches as well as with torque wrenches in case you prefer to torque your fill/drain pluigs.
 |
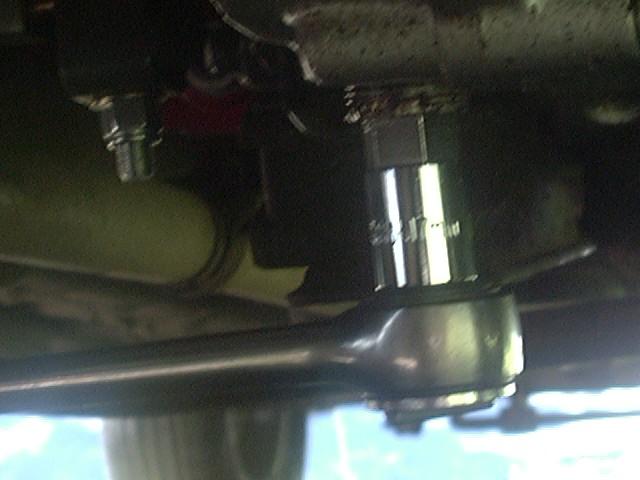 |
| 17mm Socket Adapter | Removing drain plug |
 |
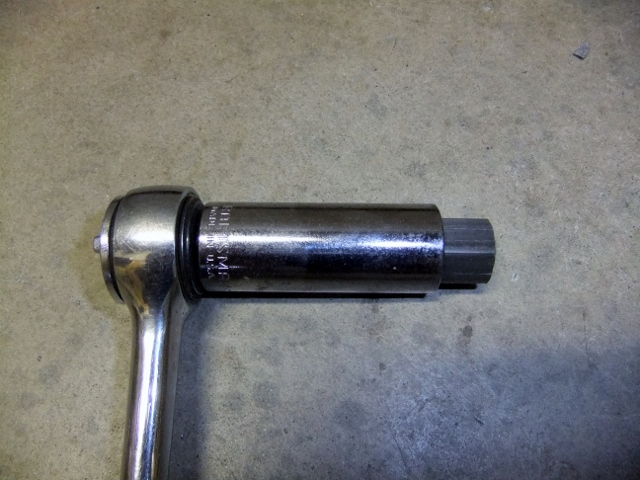 |
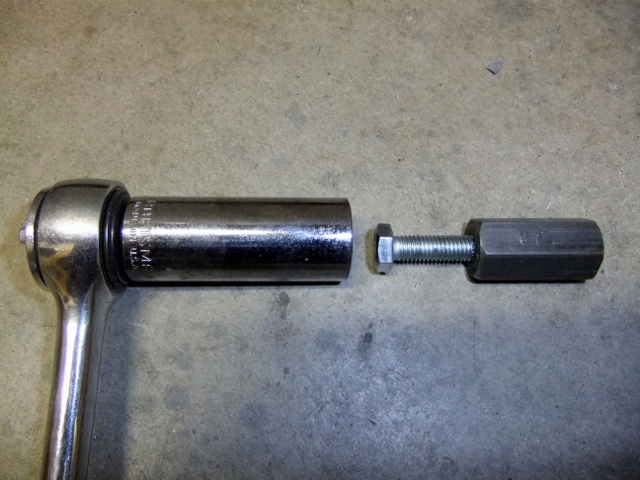
| Deluxe Adapter for deep sockets | Bolt adjusts for depth of socket |
And here it is. Pictured above-left is the adapter, 17mm hex alloy steel bar to fit whatever 17mm wrench or socket you have. Pictured above-right is the adapter fitted to a 3/8" drive ratchet and socket to remove the drain plug, but if you have a 1/2" drive socket, the adapter will work fine in that as well. Works equally well on fill plug, too. Advantages of the adapter is that you can use it with any 17mm socket, and all the extensions, ratchets, breaker bars, torque wrenches, air tools, you have. Also, for deep well sockets, such as shown on the lower row of images, we make a deluze adapter with a center threaded hole and bolt to allow the depth that the 35mm long adapter fits into a deep socket.
A couple of handy tips before trying to remove the drain and fill plugs are listed below:
- First, make sure you can remove the FILL plug before you try to remove the DRAIN plug. Nothing like the feeling of struggling to get the fill plug out while the gear oil is draining out the bottom!
- Be sure to clean out the socket in the plug before inserting whatever removal tool you are planning to use. I like to use a small pick or screwdriver to get into the bottom corners of the socket and then spray it out with some solvent or cleaner to ensure the tool can fit fully into the socket.
- Then tap the tool into the socket of the plug to make sure it is fully seated. If it doesn't feel like it is in there solid, remove it and look for anything hanging it up like dirt or a burr, etc.
- Before reinstalling a plug, make sure to clean and inspect the threads. I like to use a wire brush around the outside to get any grit out of the threads. Then wipe off the area around the threaded hole and the internal threads. I find the grit in the threads of the plugs is a common cause of having them be difficult to remove the next time.
- Screw the plug in by hand and it should turn smoothly. If it feels gritty or gets tight too fast, pull it out and find out why before cranking it in farther. This is a slightly tapered hole and the plug should get gradually tighter as it is screwed in to make a seal. There are no washers or gaskets or other sealers involved in a leak free plug.
Ordering Information:
We have a limited stock of items such as:
- Steering Extensions
- Driveshaft Spacers
- Upper Control Arm braces for 2WD Toyota pickups
- Weld-on Cab / Body Mount brackets
- Seat Lift kits
- Starter Solenoid Contacts
- Bilstein Shocks for VW pickups
- H4 switched power headlight relay harness
-
Some customers have reported issues with the Paypal order buttons while using the Safari web browser on an iPhone.
- If so, try a different browser and see if that works better.
| 4Crawler Offroad contact link | MissingLinkZ contact link |
Check out our growing collection of on-line design information so that you can make your own parts. Maybe you have a neighbor or acquanitance that can help or check out a local maker space or adult education machining class. Or engage a local or on-line machine shop to make them for you. Before you ask, no, we're not making any more of these items, rather we wanted to empower YOU to be able to make your OWN custom parts.
You'll find designs for body lift, suspension components and more, below:
- Thingiverse
- Printables
- Cults3D
- Maker World/BambuLab
-
GitHub
-
Includes RockSliderz and IFS Frame Brace designs
There's a wide selection of on-line 3D Printing and Machine Shop services available today. A few that we've heard of:
- Xometry.com, ProtoLabs.com, Mfg.com, eMachineShop.com, Hubs.com, RapidDirect.com, RenovoCNC.com, PartsBadger.com, ProtoTek.com, FicTiv.com, Jlc3DP.com, PCBWay.com, SendCutSend.com, etc.
-
Many of our model files use OpenSCAD and if you need to convert those to other CAD formats, use FreeCAD.
- Simply import the OpenSCAD file into FreeCAD then export it in the desired CAD format the on-line shop requires.
We've sold out of this tool. If you want to make your own, pick up a length of 17mm hex rod and cut off a short length.
|
|
|
| SOLD OUT | SOLD OUT | SOLD OUT |
| ~~~~~ | ~~~~~ | ~~~~~ |
|
|
|
| SOLD OUT | SOLD OUT | SOLD OUT |
Notes:
- Parts are shipped from zip 95051 (CA)
- A tracking number will be provided
[Return to the main MissingLinkZ page.. ]
Visitor # since 21.MAR.2002
[Last updated: 17.November.2025]